If you have a PC from a maker like Dell, Lenovo, or MSI, you might have noticed that there are details about the company and support options in Windows Settings' About section. However, if you built your own system, Windows will show an inelegant "to be filled by OEM" one-liner. So here's a short guide on how you can change that.
You can add OEM info in Windows 10 and 11 in order to make it show a vendor logo, a name, and other details on the System > About page in Settings. This is the same information that used to appear in the classic System Properties. It's a simple tweak that won't change any aspect of how your computer runs, but it's a neat way to add an extra bit of customization to your beloved PC.
Step 1 – Where to find the OEM details
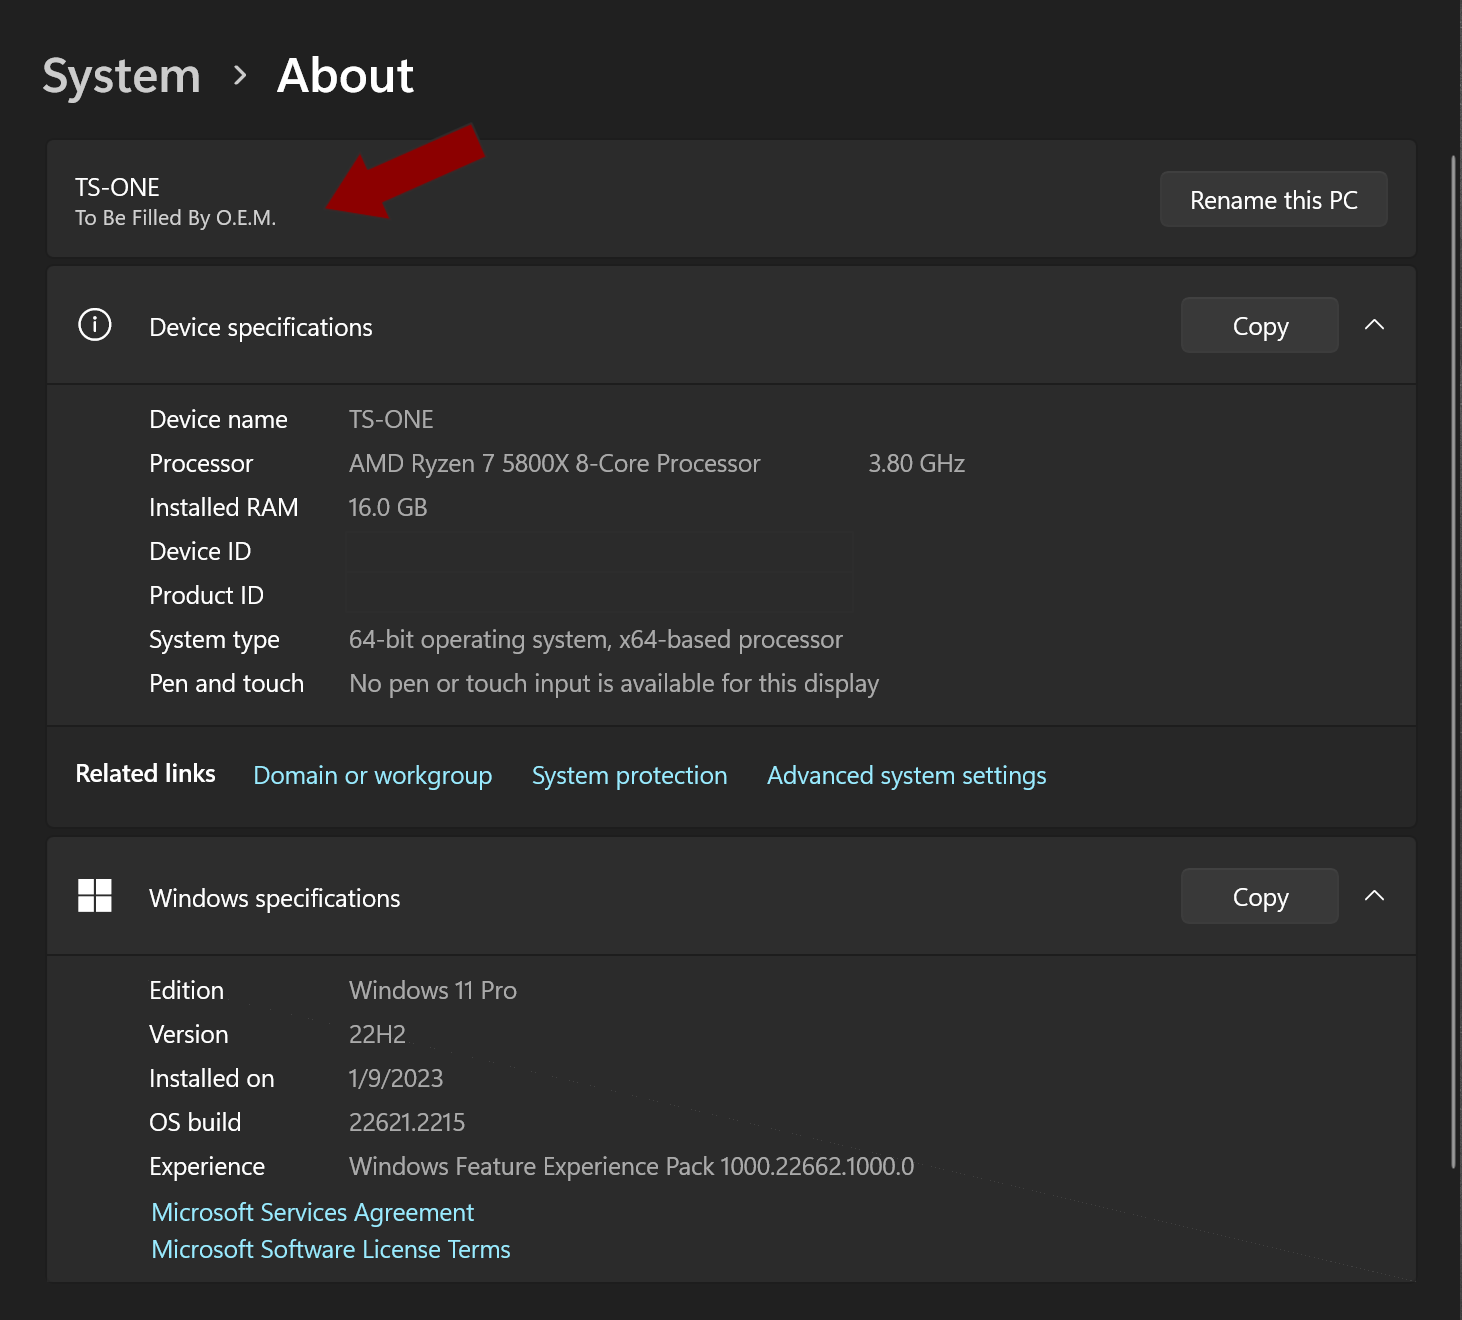
Click on Start > Settings > System > About – or you can press Win key + I and then select About at the bottom of the window. Windows 10 and 11 display almost the same information:
PCs from large manufacturers and vendors often show additional information just below the Windows specifications for getting support, but because the computer used for this article isn't a pre-built, none of that is visible.
Step 2 – Using Regedit
The Windows Registry is a huge database of every OS setting you could imagine. Normally, we'd advise delving into this and making changes if you've never done this before, as even a simple mistake can lead to some weird Windows behavior (or worse). But in this case, as long as stick to our guide, you won't break anything at all.
Click on Start and type regedit, you should see Registry Editor.
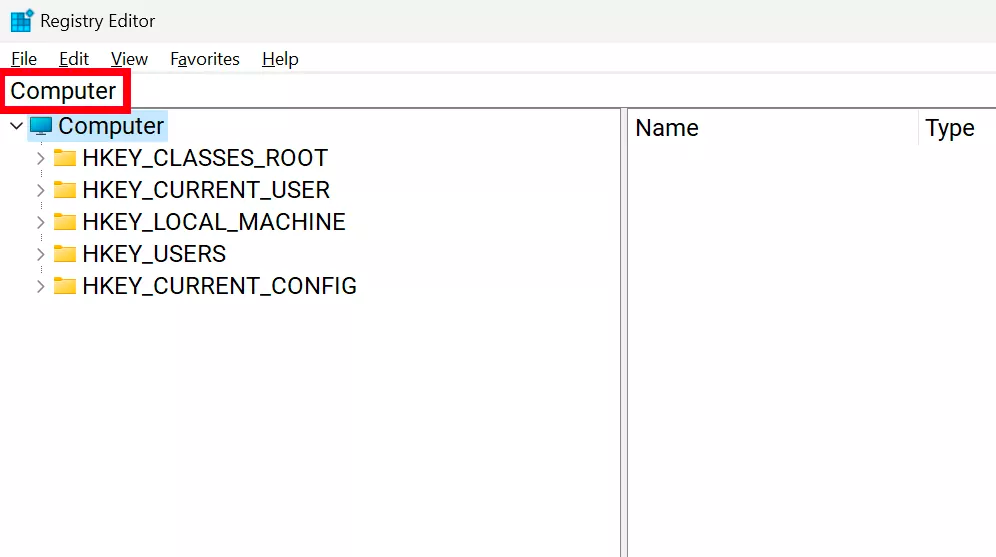
Give this a click and you should see the following window open up on your PC. Before making any changes, you might want to create a backup of the registry – click on File > Export > and choose a safe location for the backup. It doesn't matter what you name it, but make sure you select the All option at the bottom of the export window.
The OEM information we want to change is located in one specific location in the registry, but instead of navigating there, click on the "Computer" location as shown in the screenshot about.
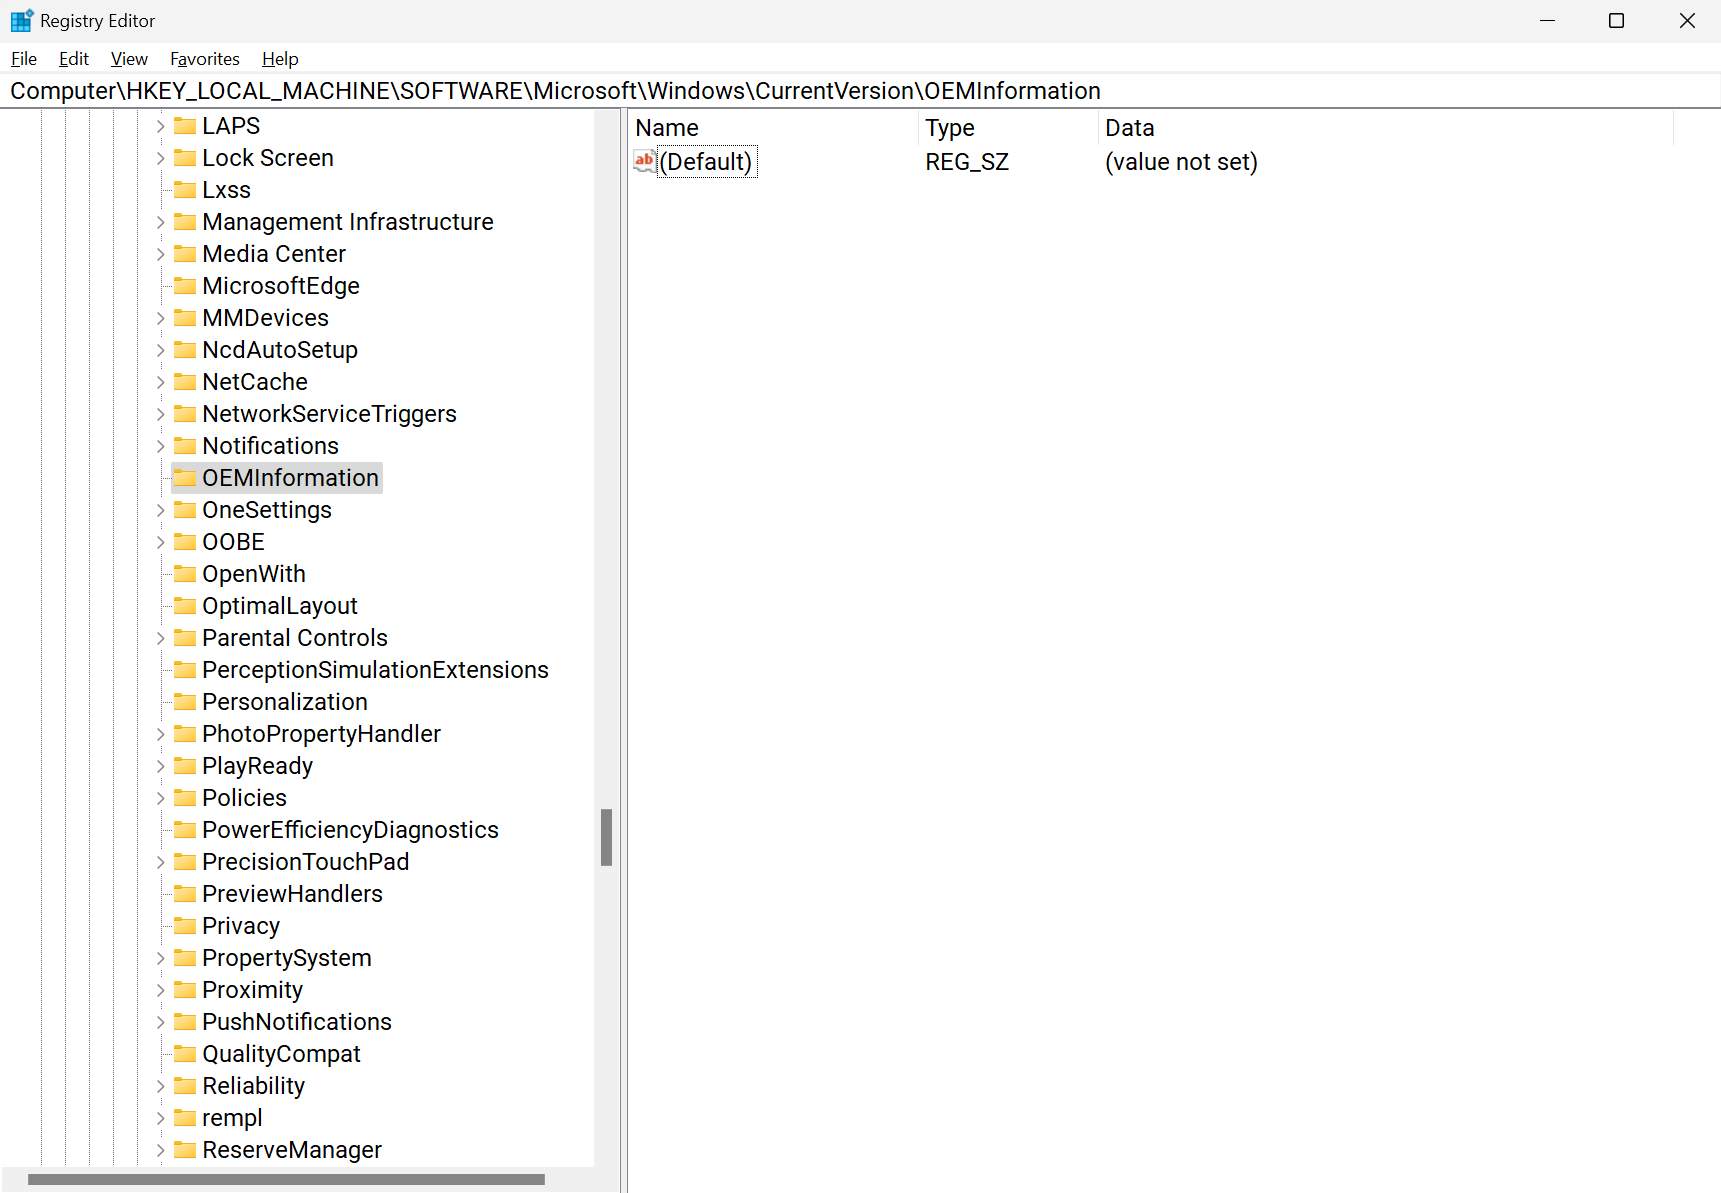
Copy and paste the following text there and hit Enter:
HKEY_LOCAL_MACHINE\SOFTWARE\Microsoft\Windows\CurrentVersion\OEMInformation
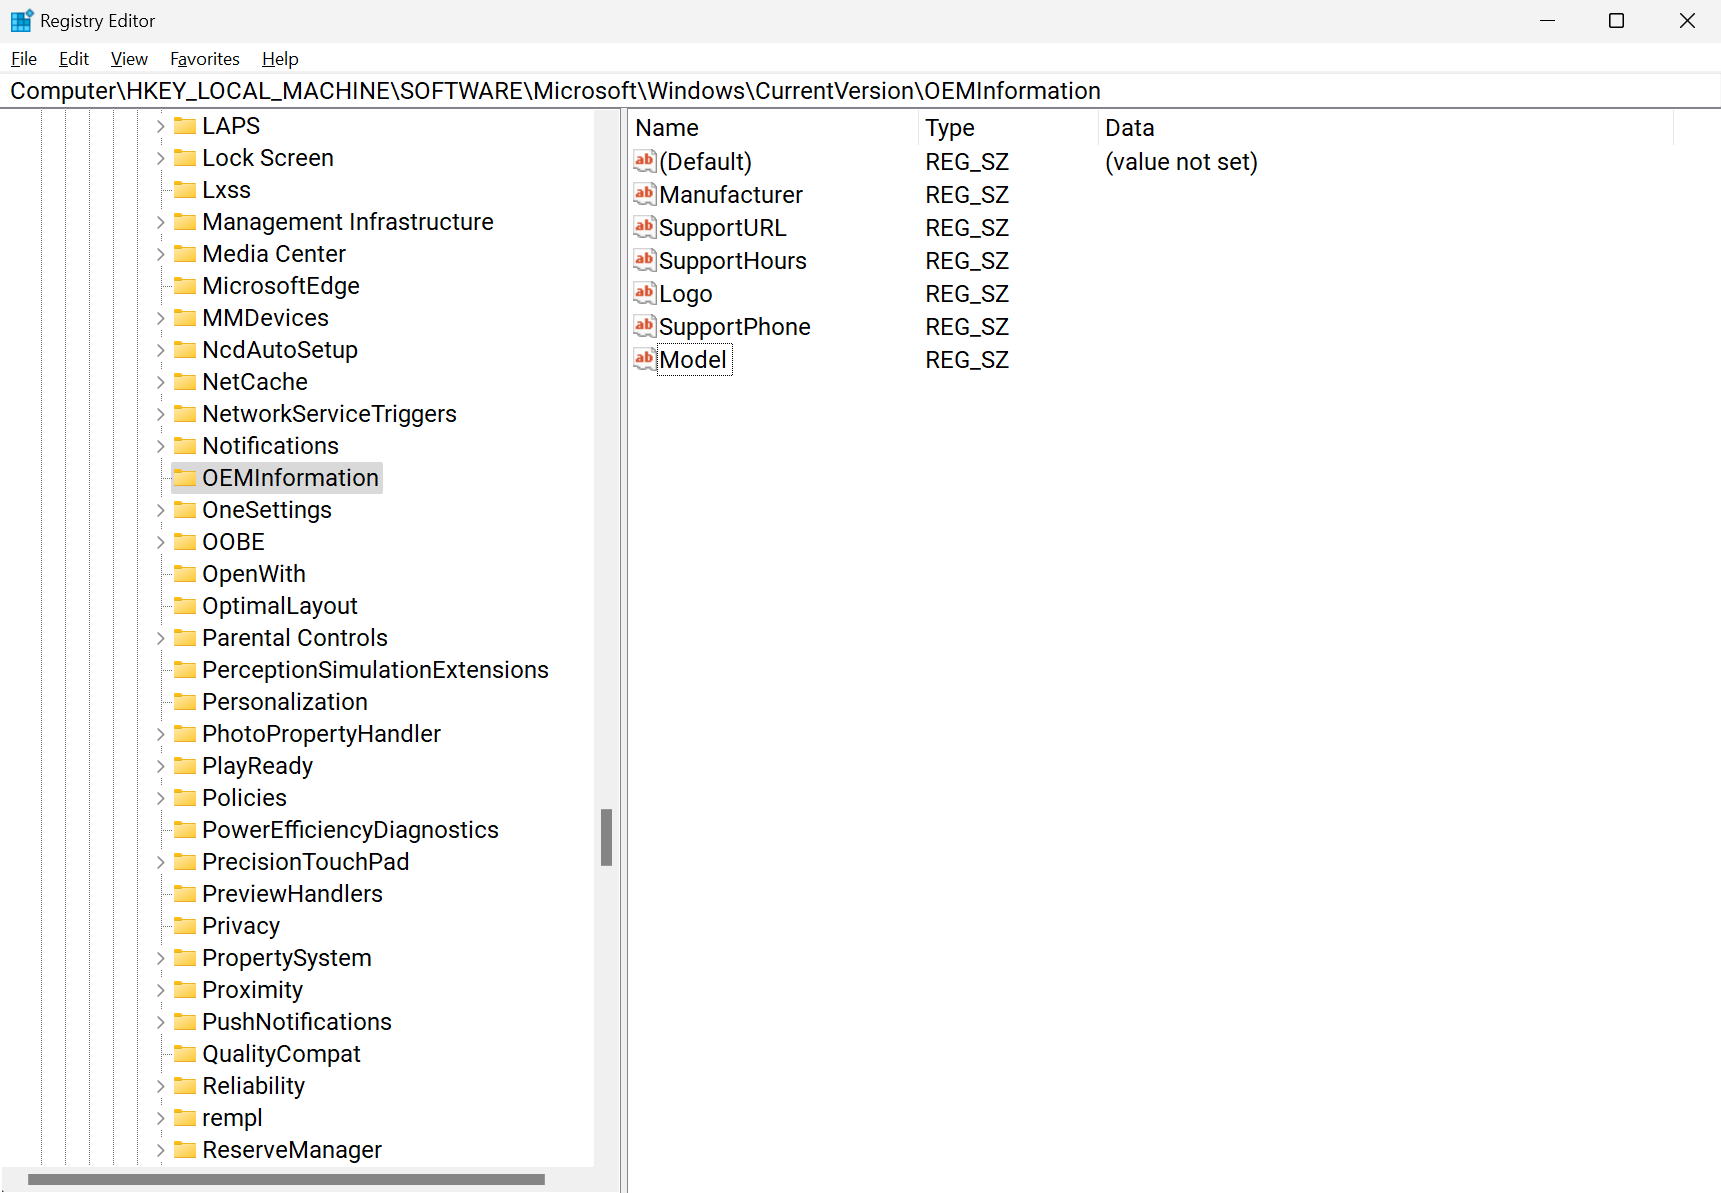
In our PC, the entries on the right are almost entirely blank, but if you do have a pre-built PC, you may see a list of entries, such as Manufacturer, SupportURL, SupportHours, Logo, SupportPhone, and Model. These entries tell Windows what to display in the system information panel.
Time to do a spot of editing!
Step 3 – Get creative with your edits
Since we don't have anything in our registry, we need to add the entries mention above.
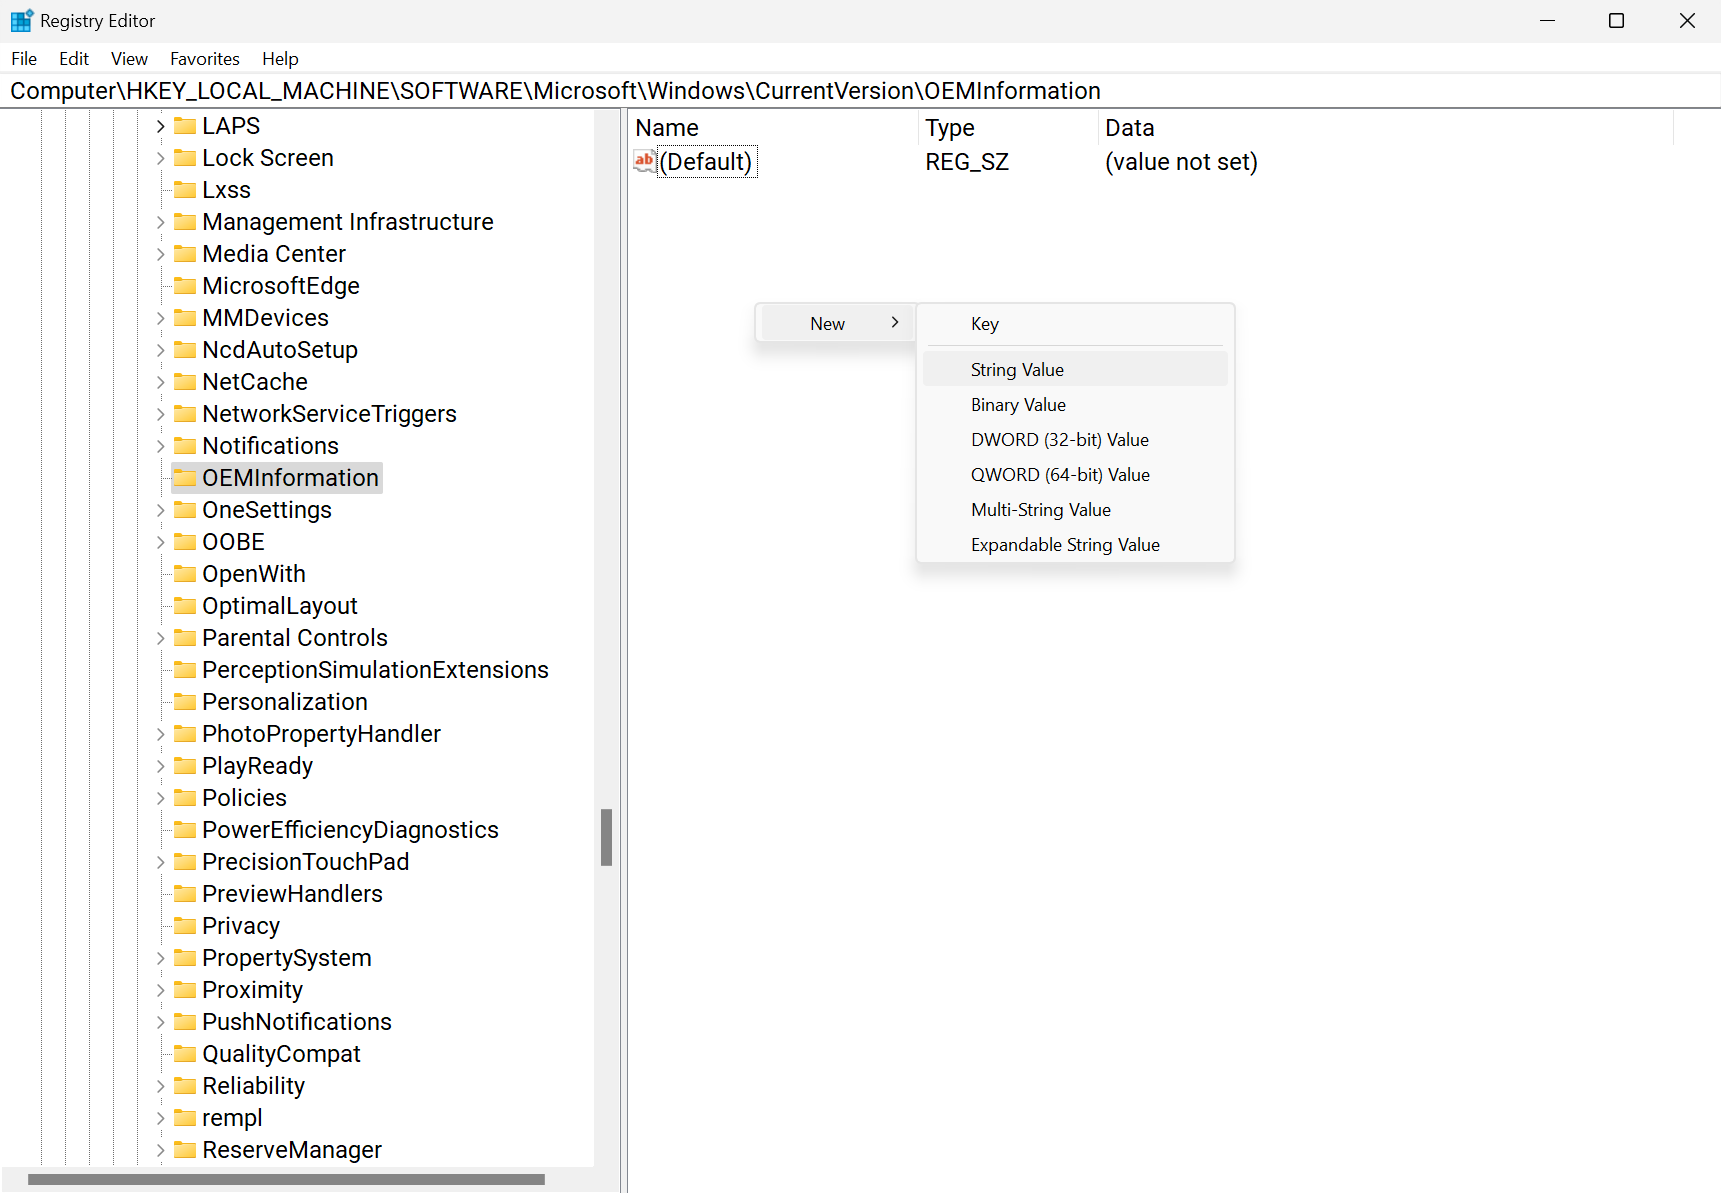
Right-click on any part of the blank space in the right panel of the registry editor.
Then click on New > String Value. You should see that a new entry has appeared in the registry, waiting for you to name it.
Make sure you name them exactly as we've written them below – be careful about what letters are capital and which are lowercase. Once you're done, you should see the following...
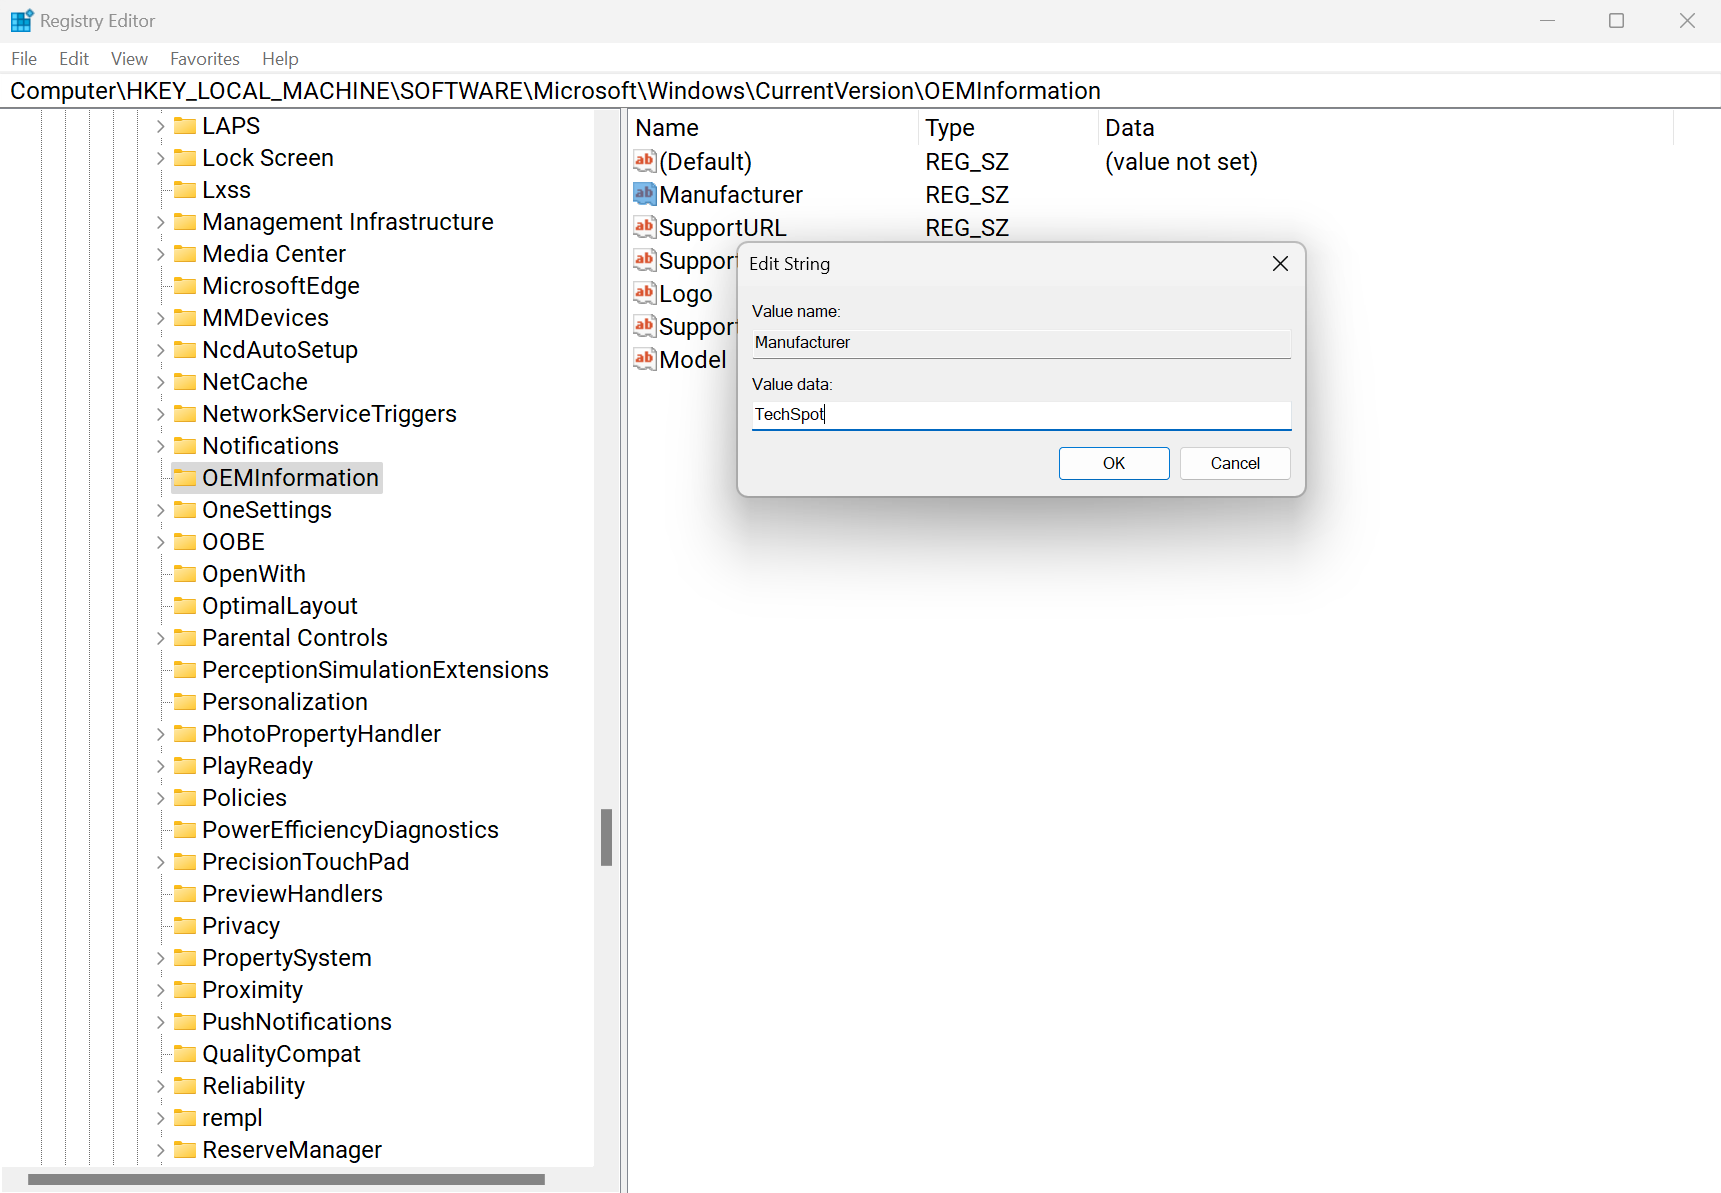
To further edit these, double-click on each entry, and then type in whatever you want into the Value data field. It's going to be nothing more than simple text (up to 267 characters).
What each entry shows is pretty self-explanatory – the registry entry labeled Manufacturer is obviously for showing the name of the PC's maker.
There are two entries that require specific information into them.
The text you enter for SupportURL needs to be a full web address – using something like techspot.com or www.techspot.com is no good – but using https://www.techspot.com will work just fine.
The Logo entry is redundant in Windows 11 – it doesn't matter what you enter into the field, Microsoft's latest OS ignores it. However, if you're using Windows 10, then putting the full file address of a small image on your computer will make it show up to the right of the system information. This image must be 120 x 120 pixels in size or smaller, and it must be in BMP format.
Step 4 – Marvel at your creative talent
With everything filled in, the registry editor content might look something like this:
Any changes you do in the editor won't go live until you close the Settings window and open it again. Your PC will now display a new level of information beyond all measure!
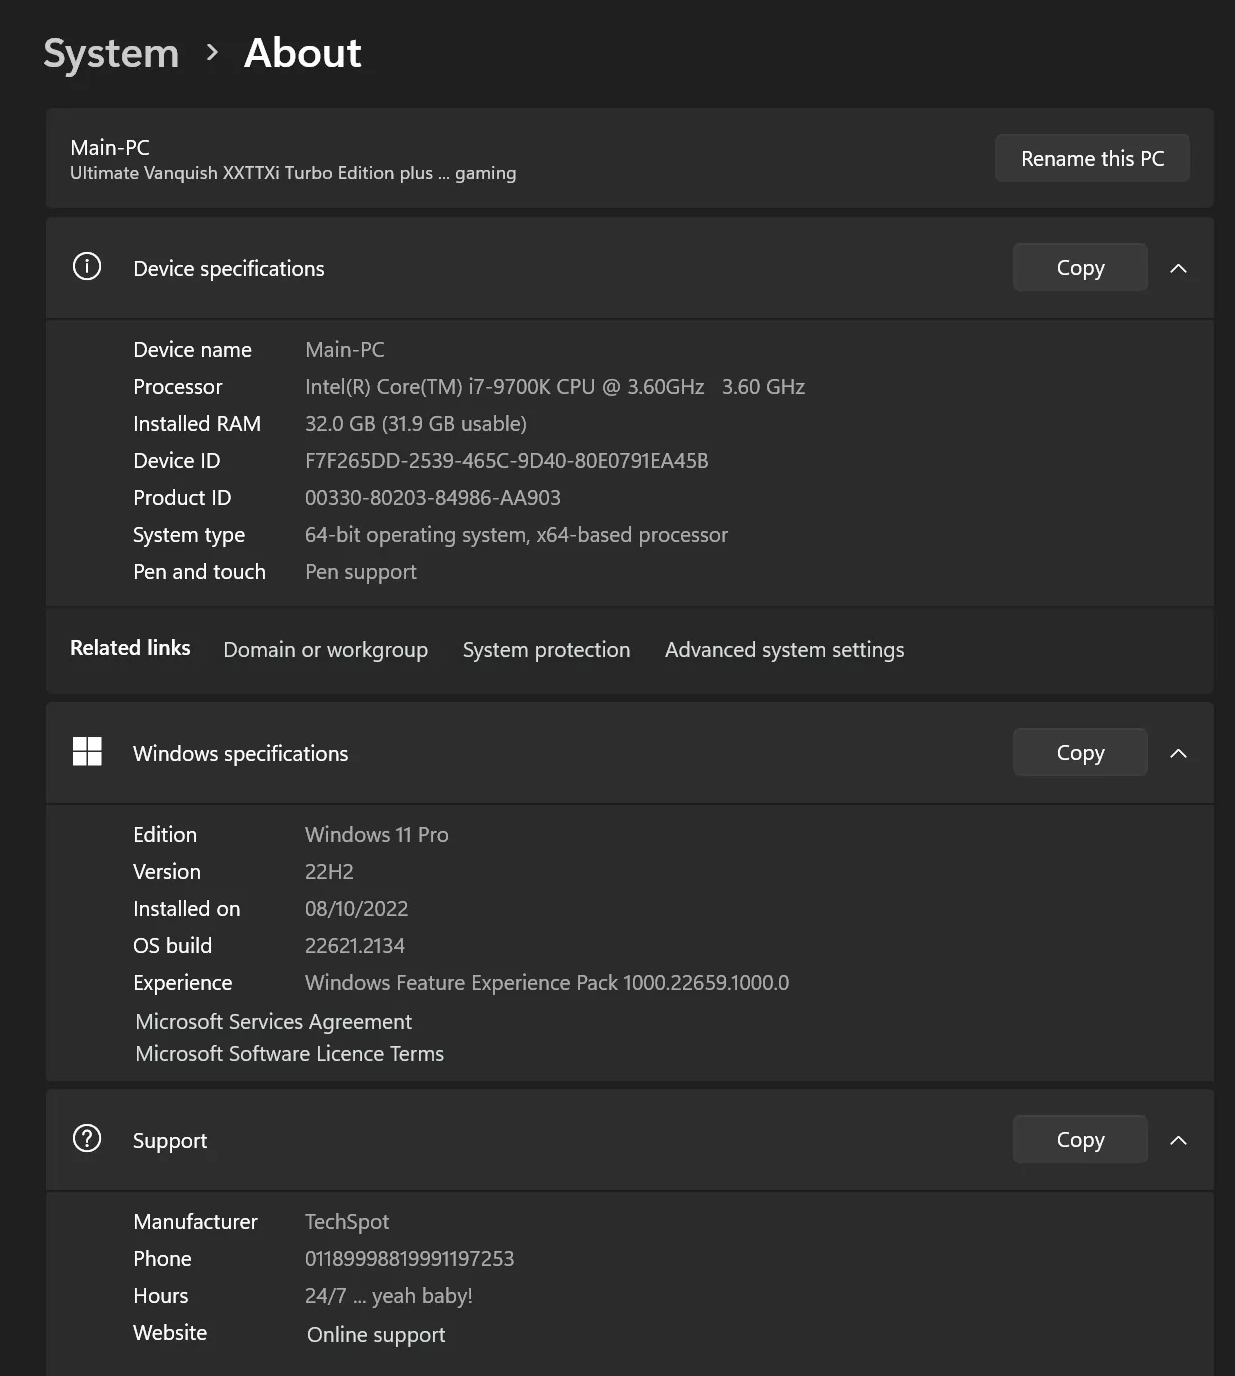
So, we're exaggerating into the realms of ridiculousness, but you can see the changes at the top and bottom of the About details. It's more impressive in Windows 10 than it is in 11, but that's software progress for you.
On a more serious note, if you're making a PC for a friend, then you can add some useful tips or a handy link for the new user to use if they ever get stuck. Just remember to tell them that they can find this by right-clicking on the Start Menu and selecting System.
The process of changing the registry to display this information should also work in older Windows versions. There's also a variety of small utilities that will do the same thing without registry editing, but it's such a quick and easy thing to do manually, that it's just not worth your time finding a suitable app just for this purpose.
